How to Calculate Rebar for Slab
A five-step spec, generated live. Pick the slab type, enter the dimensions, and the generator returns the full specification — bar size, spacing, grid counts, double edging, weight, and the order in sticks.
Slab Rebar Spec Generator
Defaults: 24 × 36 ft driveway — the worked example below prices this exact spec, double edging included.
- Across width: (36 × 12 ÷ 18) + 1 = 25 bars × 24 ft
- Across length: (24 × 12 ÷ 18) + 1 = 17 bars × 36 ft
- Grid: 1212 ft + edges: 240 ft = 1452 ft
- Net weight: 1452 ft × 0.668 = 970 lb
- Order (+12% waste): 1086 lb = 82 sticks of 20-ft
- Steel cost @ $0.70/lb: $760
How to Calculate Rebar for a Slab: The 5-Step Process
Slab rebar calculation is a fixed five-step sequence, and each step feeds the next. Step 1: measure the slab — length, width, thickness, and what will drive over it. Step 2: choose the grid direction logic — two-way for anything whose length is less than 1.5× its width. Step 3: match the bar size to thickness and load — 4 inches takes #3, 4–5 inches takes #4, 6 inches takes #5, all at 18 in on center as the residential default. Step 4: add edge reinforcement, and double it on any slab vehicles will touch. Step 5: run the numbers — bars per direction, total length, edge bars, weight, waste, sticks. The generator above executes all five; this guide explains each one well enough that you can audit its output line by line.
The sequence matters because the steps are coupled. The grid choice in step 2 decides whether both directions carry main bars or one direction shrinks to temperature steel. The bar size in step 3 sets the unit weight that every later dollar figure multiplies. The edging decision in step 4 adds up to 20% of the takeoff on a driveway — skip it and the order lands 240 ft short on the worked example below. Skipping a step does not save time; it relocates the step to pour day, where it costs triple.
Step 1–2: Measure the Slab and Choose One-Way vs Two-Way Grid
The grid decision is a load-path decision dressed as geometry. A two-way grid — main bars in both directions at the same spacing — is correct whenever loads can travel either way, which on grade means any slab whose aspect ratio (length ÷ width) is under 1.5. Patios, driveways, garage slabs, and interior floors all qualify; the same total footage simply rotates 90 degrees compared with a one-way layout, so the two-way choice costs nothing extra. A one-way layout concentrates main bars in the short span direction with lighter temperature steel across — the right answer for long strips like sidewalks, curb approaches, and wall footings, where loads have one honest path.
Measurement has two traps worth naming. Measure to the formed face, not the string line — forms eat 1–2 inches per edge and the grid follows the forms. And confirm the spacing convention: “18 in on center” places a bar at each edge with centers 18 in apart, while “clear spacing 18 in” puts 18 inches of bare concrete between bar faces and changes every count by one. The +1 fence-post rule in step 5 assumes on-center spacing; if the drawing says clear, convert before counting, not after.
Step 3: Match Bar Size to Slab Thickness and Load
Bar size follows thickness first and load second. The table is the residential and light-commercial map that covers most on-grade work; anything thicker than 6 inches, carrying columns, or spanning between footings belongs to the structural drawings.
| Slab thickness | Typical use | Bar size | Spacing | Grid + edges | Risk if undersized |
|---|---|---|---|---|---|
| 4 in | Patios, walkways, garden paths | #3 | 18 in | Two-way, single edge bars | Low |
| 4–5 in | Driveways, shed pads, garage slabs | #4 | 18 in | Two-way, double edging | Medium |
| 5 in | Interior floor slabs, workshop floors | #4 | 18 in | Two-way, no edge bars (walls) | Low |
| 6 in | Parking, RV pads, light commercial | #5 | 18 in | Two-way, double edging + dowels | High |
| 8 in + | Structural slabs, transfer decks | #5–#6 | 12 in | Per drawings only | Engineered |
Step 4: Double Edging — the Edge Reinforcement Math
A slab edge is the one place the grid cannot help: a wheel load at the free edge bends the slab with nothing beyond it to share the moment. Double edging answers with two extra bars running the full perimeter, inset 3–4 inches from the formed face, tied to the grid at every second intersection. The math is perimeter arithmetic: edge bars = 2 × (2 × length + 2 × width). The 24 × 36 ft driveway carries 2 × (72 + 48) = 240 ft of edge steel on top of its 1,212-ft grid — a 20% quantity bump, 160 lb of #4, about $112 of steel, and the difference between an edge that spalls in five winters and one that does not.
Single edging — one perimeter bar per edge, half the footage — belongs on pedestrian slabs: patios and walkways whose edges see a hand truck at worst. Interior floors skip edge bars entirely because the perimeter walls or foundation provide the edge restraint the bars would otherwise supply. The generator above switches the edging multiplier with the slab type — patio 1×, driveway and parking 2×, floor 0× — so the takeoff never silently assumes the wrong edge condition.
Step 5: Run the Quantity and Price Numbers
The quantity math assembles everything the earlier steps decided. Bars per direction: (dimension × 12 ÷ spacing) + 1. Total length: bars across the width × width + bars across the length × length. Add the edge bars from step 4, multiply by the bar's unit weight for pounds, add 12% waste, divide by 20-ft stock and round up for the stick count. On the 24 × 36 driveway: 1,212 ft grid + 240 ft edges = 1,452 ft → 970 lb → 1,087 lb ordered → 28 sticks → $761 at $0.70/lb.
This spec plugs directly into the site's toolchain. The main rebar calculator on the homepage takes the same length, width, and spacing inputs and returns the grid quantity and cost — the generator here adds the slab-type intelligence (bar size, edging, cover) on top. For the deeper math behind the stick count, the rebar quantity guide walks the two core formulas and the 20/40/60-ft stock trade-offs; the rebar spacing guide covers the spacing-versus-size trade matrix; and the rebar price calculation guide converts the order into a supplier-ready budget. Five steps here, one click there, no re-entry.
How to Calculate Rebar in a Concrete Slab: Worked Example
Run the full spec on the default slab — 24 × 36 ft driveway, #4 at 18 in on center both ways, double edging. Across the width: (36 × 12 ÷ 18) + 1 = 25 bars × 24 ft = 600 ft. Across the length: (24 × 12 ÷ 18) + 1 = 17 bars × 36 ft = 612 ft. Grid: 1,212 ft. Edges: 2 × (2 × 36 + 2 × 24) = 240 ft. Total: 1,452 ft of #4 = 970 lb net. Order at 12% waste: 1,087 lb, 28 sticks of 20-ft bar, $761 of steel at $0.70/lb before fabrication.
Place it with the same discipline the numbers assumed: bars on 1.5-inch chairs for a 4–5 inch slab (the steel sits in the lower third, 2 inches off the subgrade), edge bars held at 3–4 inches inset with a hook or L where the driveway meets the garage apron, and control joints cut in the first day so cracks choose the joint, not the grid. The spec assumed 2 inches of cover to earth — verify with a tape before the truck arrives, because every half-inch of lost cover is years of service life.
The Grid You Order Is the Grid You Pour
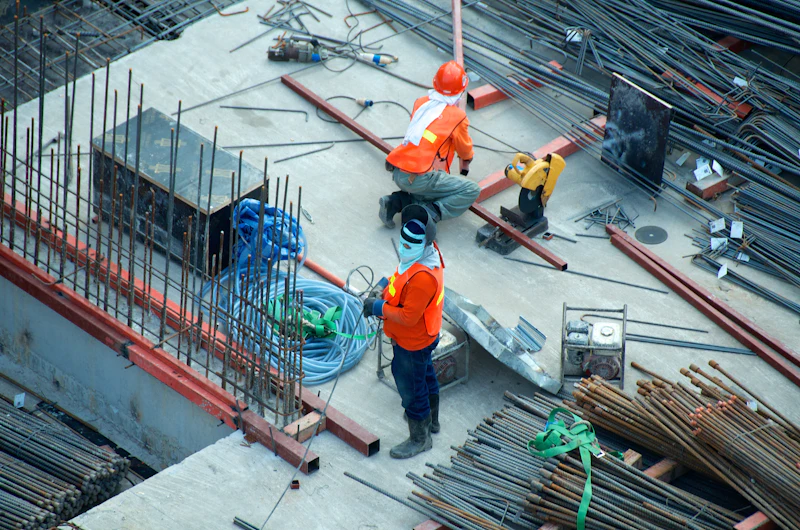
A spec sheet only survives the pour if the placement matches it: chairs at 3–4 ft spacing, edge bars tied to the grid, spacing verified with a tape pulled across the mat. The calculator produces the quantity; the crew produces the slab — and the two meet at the same numbers.
Foundation Slab vs Floor Slab vs Pavement Slab
“Slab” covers three different animals, and the spec changes with each. A foundation slab works for the structure above it; a floor slab works for traffic on it; a pavement slab works against weather and wheel loads. The table lines the three up on the six dimensions that actually move the takeoff.
| Aspect | Foundation slab | Interior floor slab | Pavement slab (driveway / road) |
|---|---|---|---|
| Carries | Walls, columns, the building | Foot traffic, forklifts, racking | Vehicles, weather, frost heave |
| Cover | 3 in (cast on earth) | 1.5 in (interior, dry) | 2 in (exterior exposure) |
| Typical steel | #4–#5 @ 12 in | #3–#4 @ 12–18 in | #4 @ 12–18 in |
| Edge treatment | Turned-down edge = footing bars | None — perimeter walls restrain | Double edging + thickened edge |
| Mats | Single, two at point loads | Single | Single |
| Calculation tweak | Edge strip taken off as footing steel | Grid only, joints at saw cuts | Edge bars add up to 20% of takeoff |
Slab-on-Grade vs Raised Slab vs Concrete Pads: Three Special Cases
Three slab situations need modifiers on the standard five-step process, and each fails in a predictable way when the modifier is skipped. Slab on grade carries soil, a raised slab carries span, and a pad carries almost nothing — the steel logic differs more between these three than it does between a patio and a parking lot.
Slab-on-Grade Rebar Calculation
True slab on grade — soil under the whole footprint — never carries itself, so its steel is shrinkage-and-temperature steel straight from the thickness map, not span steel. That makes a slab on grade rebar calculation the cheapest of the three cases: run the two-way grid at 18 in on center, apply the 3-inch earth cover, add the thickened-edge strip as separate footing steel where vehicles or light framing meet the slab, and the takeoff is done. The trap is hybrid slabs: a “grade slab” that bridges a plumbing trench or poor backfill is spanning, and the panel over the trench needs the same steel a raised slab gets — usually #4 @ 12 in both ways with the bars detailed to tie into the trench edges.
Raised (Elevated) Slab Rebar Calculation
A raised slab spans between stem walls, grade beams, or footings, and the moment that span creates reshapes the takeoff: bottom bars sized for the span (start at #4 @ 12 in), top bars over the supports for negative moment, and crank bars that walk from bottom to top at each support line. A raised slab rebar calculator that sizes only a bottom grid misses 15–30% of the real steel on a residential porch or stem-wall floor. Cover follows exposure — 2 inches in exterior air, 1.5 inches interior — and the slab edge that lands on the footing needs dowels with laps that our rebar footings guide details. Anything spanning more than about 10 ft, or carrying a wall above, belongs to an engineered drawing; the five steps here then produce the order, not the design.
Concrete Pad Rebar Calculation
Pads — shed, AC condenser, hot tub, heat pump — run the same grid at the smallest possible scale: one layer, #3 at 18 in on center for a 4-inch pad, #4 for 5 inches under a hot tub, no edge bars under roughly 10 × 10 ft, 12% waste. An 8 × 8 ft condenser pad works out to about 84 ft of #3 and 32 lb — one bundle of sticks. The only real decision is the load: a hot tub weighs as much as a car concentrated on its footprint, so it takes the 5-inch/#4 pad and level, compacted base that a shed never needs. A concrete pad rebar calculator automates the arithmetic; the thickness map above sets the bar.
Spec Sheet Deconstruction: Every Line, Its Rule, Its Risk
The generator's output is six decision lines. This table opens each one — the rule it applies, the physics it serves, and what breaks when it is ignored — so the spec sheet reads as reasoning, not magic.
| Spec line | Rule applied | Why it matters | Risk if ignored |
|---|---|---|---|
| Bar size | Thickness map: 4 in → #3, 5 in → #4, 6 in → #5 | Steel class matches the slab's load design | High |
| Spacing | 18 in OC default; 12 in under vehicle wheel lines | Distributes shrinkage cracks between bars | Medium |
| Grid type | Two-way whenever length ÷ width ≤ 1.5 | Loads travel both directions on square-ish slabs | Medium |
| Double edging | 2 perimeter bars on exterior vehicle slabs | Free edges take wheel loads with no lateral help | High |
| Concrete cover | 3 in on earth / 2 in exterior air / 1.5 in interior | Keeps water and salts off the steel | High |
| Waste allowance | 12% over net length before stick rounding | Cuts, laps, and offcuts never reach the slab | Low |
Two Slab Layout Pitfalls That Change the Numbers
Spacing Measured Face-to-Face Instead of On-Center
A crew taping 18 inches between bar edges on #4 bar actually places centers 19.3 inches apart — over a 36-ft run that drops one bar and stretches the crack-control distance 7%. The grid count assumes center-to-center. Pull the tape from centerline to centerline, or mark centers on the form before the first bar lands.
Edge Bars Ordered with the Grid but Not the Waste
Edge bars get cut from the same sticks as the grid, so they share the 12% waste — but estimators who add them after applying waste to the grid order 240 ft of “clean” edge steel that has no slack. On the worked example that is 2 sticks short when the apron hooks eat their allowances. Apply waste to the combined total, always.
Match the slab type honestly — the biggest generator errors come from “driveway” slabs typed as patios. The type drives bar size, edging, and risk class; one honest dropdown click is worth three site fixes.
The spec assumes cover you must deliver: 3 in on earth, 2 in exterior, 1.5 in interior. Chairs at 3–4 ft spacing are part of the takeoff — a slab whose steel touches the subgrade has zero cover where it matters most.
Don't run vehicle slabs without double edging. The free edge takes wheel loads alone, and the 240-ft detail on the worked example is the cheapest insurance in residential concrete — about $112 of steel.
Roof Slab Rebar Calculation: The Roof Casting Section
A roof slab — the casting over a beam-and-column or load-bearing-wall frame — is calculated like a structural slab, not a pavement: it spans, it weathers, and it carries live load on its top face. The base grid follows the same five steps with structural settings: 5–6 in thickness, #4 @ 12 in on center both ways as the residential default, and 2 inches of cover on the top face because roofs take sun and rain for their whole life. Where the roof bears on beams, the top of the slab goes into negative moment over each support line, so the takeoff adds top steel or crank bars over the beams — a band roughly L/5 wide each side of the support — plus parapet dowels around the perimeter.
Worked example for a 20 × 30 ft roof casting on masonry walls, #4 @ 12 in on center both ways: bars across the width (30 × 12 ÷ 12) + 1 = 31 bars × 20 ft = 620 ft; bars across the length (20 × 12 ÷ 12) + 1 = 21 bars × 30 ft = 630 ft; grid 1,250 ft = 835 lb of #4. Add the top steel over supports (about 10% of grid on a small roof), the parapet dowels, and 12% waste, and the order lands near 1,050 lb. Two roof-specific placement notes: the slope for drainage comes from the screed, not the steel — keep the grid level with cover blocks — and the waterproofing layer protects the steel you ordered, which is why the 2-inch cover matters more up here than on any slab on grade. For the beams and columns under the roof casting, our rebar beam guide and column guide carry their own takeoffs.
Frequently Asked Questions
Top QuestionHow do you calculate rebar for a concrete slab?▼
Five steps, in order. Step 1: measure the slab and note thickness and use. Step 2: choose the grid — two-way (bars both directions) for any slab whose length is less than 1.5× its width. Step 3: pick bar size from thickness — 4 in → #3, 4–5 in → #4, 6 in → #5 — at 18 in on center. Step 4: add edge reinforcement, doubling the perimeter bars on driveways and vehicle slabs. Step 5: run the quantity: bars = (dimension × 12 ÷ spacing) + 1 per direction, total length = rows × width + columns × length, plus edge bars, plus 12% waste. The spec generator at the top of this page runs all five steps on your dimensions.
How to calculate rebar in a concrete slab with a two-way grid?▼
Count each direction separately and add. For a 24 × 36 ft slab at 18 in on center: bars spanning the width = (36 × 12 ÷ 18) + 1 = 25 bars × 24 ft = 600 ft; bars spanning the length = (24 × 12 ÷ 18) + 1 = 17 bars × 36 ft = 612 ft; grid total = 1,212 ft. The +1 on each count is the fence-post rule — bars exist at both edges. Convert to weight with the bar's unit weight (a #4 weighs 0.668 lb/ft): 1,212 ft = 810 lb before waste and laps.
How to calculate the rebar quantity in a slab with double edging?▼
Add the perimeter bars to the grid total before applying waste. Double edging means two extra bars parallel to each of the four edges, inset 3–4 in from the slab face: edge length = 2 bars × (2 × length + 2 × width). On the 24 × 36 ft driveway that is 2 × (72 + 48) = 240 ft on top of the 1,212-ft grid — a 20% quantity bump that a grid-only takeoff misses entirely. The combined 1,452 ft × 0.668 lb/ft = 970 lb, × 1.12 waste = 1,087 lb ordered, about 28 sticks of 40-ft #4.
How to calculate rebar needed in a concrete foundation slab?▼
A foundation slab carries structure, so three things change. Cover grows to 3 in because the steel sits on earth or vapor barrier. The bar size steps up — #4 minimum, #5 under bearing walls or columns — and spacing tightens to 12 in under point loads. Add the turned-down edge or thickened edge: that strip is a footing, and it carries 2–3 continuous #4 bars plus the same 40d laps as any footing. Take off the flat grid with the five steps, then take off the edge strip separately as footing steel — never blend them into one grid number.
What size rebar for a 4-inch slab vs a 6-inch slab?▼
A 4-inch residential slab (patio, walkway) takes #3 at 18 in on center both ways — the steel is there for crack distribution, not structural capacity. A 4–5 inch driveway takes #4 at 18 in because vehicle wheel loads concentrate at joints and free edges. A 6-inch slab (parking, light commercial, RV pads) steps to #5 at 18 in, or #4 at 12 in where wheel lines cross control joints. Anything thicker than 6 inches, any slab carrying columns or bearing walls, and any slab spanning between footings is an engineered design — the drawings, not a thickness rule, set the steel.
One-way or two-way grid for a residential slab?▼
Two-way, almost always. A one-way layout (main bars in one direction, temperature steel in the other) belongs on slabs that span predominantly one way — aspect ratio over 1.5, like a long sidewalk on grade. Residential patios, driveways, and floors are square-ish and load in both directions, so both directions carry main bars. The cost difference is zero: the same total footage just rotates one direction. Where one-way genuinely appears is shrinkage-only slabs — and even there the temperature mat uses the same spacing formula, just with smaller bar.
Can wire mesh replace rebar in a slab?▼
For a 4-inch patio or walkway, 6×6-W1.4/W1.4 welded wire mesh is a legitimate substitute — it provides roughly equivalent cross-sectional area to #3 at 18 in and costs less labor. The catch is positioning: mesh does nothing until it sits in the lower third of the slab, and it famously ends up in the dirt when crews walk it flat. Slabs on driveways and thicker sections should stay with rebar — #4 bars hold their position on chairs, take hook forming at edges, and accept the double-edging detail that mesh cannot form. Mesh also cannot be spot-graded per direction the way a bar grid can.
What does a rebar calculator for a slab return?▼
A rebar calculator for a concrete slab takes the slab length, width, bar size, and spacing, and returns four numbers: bars per direction, total grid length (plus edge bars where the layout calls for them), order weight in pounds or kilograms, and the stick count at your stock length. A concrete slab rebar calculator may also add cost and a waste allowance — the spec generator at the top of this page returns all of it in one sheet, including the double-edging math that generic tools skip. Whether you search for a rebar slab calculator, a slab rebar calculator, or a rebar calculator for concrete slab, verify two things before trusting the output: that it adds the +1 fence-post bar per direction, and that it lets you apply the waste percentage before the stick rounding.
How do you calculate rebar for a slab on grade?▼
A slab-on-grade calculation is the five-step process on this page with one modifier: the slab never carries itself, so the steel is shrinkage-and-temperature steel, sized by the thickness map (4 in → #3, 5 in → #4, 6 in → #5 at 18 in on center) rather than by span. Cover is the earth cover — 3 inches, because the steel sits on the vapor barrier or subbase. Add the thickened-edge detail where the slab meets vehicle loads or carries light framing: that strip is footing steel, taken off separately. A slab on grade rebar calculator therefore needs only dimensions, spacing, and bar size — there is no span, no top mat, and no formwork shrinkage to chase. Where the slab on grade spans between footings or stem walls instead of resting on soil, it stops being slab on grade and becomes a structural slab — see the raised slab question below.
How do you calculate rebar for a raised (elevated) slab?▼
A raised slab — one that spans between stem walls, grade beams, or footings instead of resting on soil — must be calculated as a structural slab, not a pavement slab. The grid math is the same five steps, but three additions change the order: the steel area must be verified against the span (structural slabs usually step to #4 @ 12 in or larger, and thick ones want a top mat), negative-moment steel runs over the supports in the top of the slab, and cover follows the exposure (2 in exterior air, 1.5 in interior). A raised slab rebar calculator that only sizes a bottom grid will under-order by the top steel and the crank bars — typically 15–30% extra on a residential porch or stem-wall floor. For the footing edge the slab lands on, our rebar footings guide covers the dowels and laps that tie the two together.
How do you calculate rebar for a concrete pad?▼
A concrete pad — shed pad, AC condenser pad, hot-tub pad — is the simplest slab on this page: one layer, small area, light load. Pick the bar from pad thickness (4 in → #3, 5 in → #4), run the two-way grid at 18 in on center with the +1 rule, skip edge bars for pads smaller than about 10 × 10 ft, and add 12% waste. Example: an 8 × 8 ft equipment pad at #3 @ 18 in — bars per direction (8 × 12 ÷ 18) + 1 = 7 bars (6 bars with exact-fit spacing on an 8-ft pad, but order the fence-post 7), each 8 ft minus cover → roughly 6 × 7 × 2 = 84 ft of #3 = 32 lb, one bundle of 20-ft sticks. A concrete pad rebar calculator is doing exactly this arithmetic; the only judgment is the bar size, and the pad's load (a hot tub is not a shed) sets it.
How is calculating rebar in a floor slab different from a driveway?▼
An interior floor slab trades edge steel for perimeter restraint. There are no edge bars — the foundation walls restrain the perimeter — and cover drops to 1.5 inches because the slab sits in dry interior air, which slightly shortens every bar. The grid itself is unchanged: two-way at 18 in on center, bar size from thickness. What changes most is the joint logic: floor slabs saw-cut control joints the first day and often run joints under wall lines, while a driveway concentrates steel at joints and free edges where wheels load them. Calculating rebar in a floor slab therefore usually lands 10–15% lighter than the same footprint of driveway, almost entirely from the missing edge bars and the shorter cover deduction.
How to calculate the rebar quantity in a slab — the short version?▼
The short version: total length = bars across the width × width + bars across the length × length, then bars = total length ÷ stock length, rounded up, with waste applied before rounding. On this page's 24 × 36 ft slab that chain reads 1,212 ft → 31 sticks of 40-ft bar at 12% waste. The full treatment — per-bar cut-list packing, the 20/40/60-ft stock trade-offs, lap splices, and the multi-member rollup — lives in our dedicated rebar quantity guide, which owns the deep quantity math so this page can stay on the slab-specific decisions. Use the summary here for a phone estimate; use the quantity guide before you place the order.
How do you calculate rebar for a roof slab (roof casting)?▼
Roof casting is a structural slab calculation with weather added. Run the same grid math — a 20 × 30 ft roof at #4 @ 12 in on center needs (31 × 20) + (21 × 30) = 1,250 ft = 835 lb of #4 — then add the roof-specific lines: top steel or crank bars over beam supports for negative moment, parapet dowels at the perimeter, and 2 inches of cover because the top face weathers. The full walkthrough is in the roof slab section below.
Related Rebar Calculation Guides
How to Calculate Rebar Weight
Master 3 core rebar weight calculation methods: volume × den...
How to Calculate Rebar Area
Complete guide to calculating rebar cross-sectional area usi...
How to Calculate Rebar Diameter & Size
Complete guide to rebar diameter calculation, size selection...
How to Calculate Rebar Spacing
Multi-dimensional comparison of rebar size and spacing combi...
How to Calculate Rebar Lap Length
Step-by-step SOP for calculating rebar lap length and develo...
How to Calculate Rebar in Circular Slab
Scenario-based deconstruction of rebar layout in circular sl...
How to Calculate Rebar in Column
Multi-dimensional comparison matrix of column reinforcement:...
How to Calculate Rebar in Retaining Wall
Step-by-step SOP for cantilever retaining wall rebar: stem v...
How to Calculate Rebar in Concrete Wall
Scenario-card diagnosis of concrete wall rebar: single vs do...
How to Calculate Rebar for Brick Wall
Decision-tree guide to brick wall masonry reinforcement: hor...
How to Calculate Rebar in Odd Shapes
Interactive terminal guide to rebar in odd shapes: decompose...
How to Calculate Rebar Size in Beam
Scenario-card guide to beam rebar: bottom tension steel by t...
How to Calculate Tension Capacity of Rebar
Scenario-card guide to rebar tension capacity: the T = As × ...
How to Calculate Tensile Strength of Rebar
Interactive terminal guide to rebar tensile strength: ASTM A...
How to Calculate Yield Stress for Rebar
Decision-tree guide to rebar yield stress: 0.2% offset metho...
How to Calculate Stress in Rebar
Multi-dimensional comparison matrix of rebar stress calculat...
How to Calculate Force in Rebar
Scenario-card deconstruction of rebar force calculation: F =...
How to Calculate Shear Strength of Rebar
Interactive terminal guide to rebar shear strength: stirrup ...
How to Calculate Moment for Rebar in Slab
Step-by-step SOP for calculating moment for rebar in a concr...
How to Calculate Tie Wire & Ties for Rebar
Decision-tree guide to rebar tie wire quantity: grid interse...
How to Calculate Rebar Chairs
Interactive terminal guide to rebar chair quantity: one chai...
How to Calculate Waste for Rebar
Multi-dimensional comparison matrix of rebar waste: 10–15% w...
How to Calculate Rebar for Spider Tie
Step-by-step SOP for spider tie rebar: spider bar use and st...
How to Calculate Bend Radius of Rebar
Scenario-card guide to rebar bend radius: ACI 4d standard ho...
How to Calculate Spiral Rebar Length
Empirical terminal guide to spiral rebar length: the L = n ×...
How to Calculate Rebar and Concrete with PlanSwift
Decision-tree takeoff guide for PlanSwift rebar and concrete...
How to Calculate Total of Rebar Construction Master Pro
Keystroke-level diagnostic guide to rebar math on the Constr...
How to Calculate Rebar Weight in Revit
Multi-dimensional comparison matrix of four Revit rebar weig...
What Is the Best Rebar Calculator
Step-by-step SOP for choosing the best rebar calculator in 2...
How to Calculate Rebar Price
Dashboard guide to rebar price calculation: price sources co...
How to Calculate Rebar Quantity
Stock-length scenario cards for rebar quantity: the total-le...
How to Calculate Rebar for Footings
Decision-tree footing guide: strip vs spread vs mat type ide...
How to Calculate Rebar Welding Capacity
Rebar welding calculator and guide: butt weld capacity (0.6 ...
What Is Rebar? Why Concrete Needs It & Placement Basics
The rebar encyclopedia for beginners: what reinforcing bars ...
Bluebeam Rebar Calculation
Bluebeam Revu rebar takeoff workflow: PDF import and scale c...